Tuesday, November 16, 2010

This Has To Be A Fire Hazard...

Herrow! Time for more fall pics!

Here's the whole living room in all it's glory. I wasn't sure how I'd like orange in here with all my grays and blues, but it actually worked pretty well I think!


Close up on my mantle. No it's not on fire, that's fall-y leaves! Though I definitely won't deny that this could be a fire hazard. These candles get lit only for you guys. These leaves and the little red bird were leftover from my friend's baby photoshoot, and everything else I already had. The middle candle holder was on my coffee table and the pillar candles and stands were on a shelf above my TV.


Close up on Mr. Birdie! Love how warm and glowy this looks :)

With this candle holder on my mantle, I needed something else to put on my coffee table. Here's what I decided on!


I already had this cute basket from Marshall's, I cut off some of the leaves from the mantel piece, used some candles I already had, nested in the other Mr. Birdie (they came in a pack of two), and used some of the same filler (also leftover from the baby photoshoot) that I used for my entry way table here. As much as I love you, I didn't light these candles for you. After all, they are basically sitting in a bed of tinder. Might not be smart.


Lastly, here's my dining table! Similar to my Halloween set up with the orange thing and silver tray, but using pine cones and my white World Market pumpkin instead of glitter skulls and candy corn.

I'm super proud of myself because all of these were essentially FREE (aside from the $1 bag of pine cones). Such an improvement after my Halloween spending!

How have you guys transferred Halloween and everyday decor into something Fall-ish? I'd love to see!

Much love,
Katelyn

Wednesday, November 10, 2010

It's Not My Fall(t) That I Autumn(atically) Make Horrible Puns...

This bad pun takes the cake so far. I feel like I can't write a post without a corny lame title. Anyways, I finally took down my Halloween decor and switched it for Fall! Please step in to my Autumn Emporium...

First thing I decorated was my entry way table. Since pretty much it's sole purpose in life is to be decorated.


These are the Fall colors I like! I tend to stray away from the orange-brown-yellow combo. Kinda makes me think of old lady turkey crafts. Not that I have anything against old ladies, turkeys, or crafts- I love all those things! I also love the pops of white I used on this display to freshen things up a bit, and the hint of green in the wine bottle that ties in with the green in the dried roses.


The only thing I bought for this whole display was the pine cones (a whole bag of em for $1 at Target). The pumpkins were from Halloween, the flowers were dried roses Hami gave me, and the bunnies were a present from my brother. The scarf, candles, hurricane, and wine bottle I also already had. Whoop whoop for a $1 display! Oh and the nesty filler was bought by my friend Alyssa for a photoshoot we did our friend Kendra's baby girl. Alyssa didn't want it so I got to keep it! Hells yeah!


Fun fact- this display took me a few tries to come up with. Ok that's not the MOST fun fact in the world but it is a fact. Here are some prior attempts...

bleh

blah

almost there...

Since this post is already getting long and I gotta get back to work (eek!) I'll end it here and cover the rest of the Fall decor later. More posts means more lame titles- whoopwhoop!

In the meantime... anybody else tend to shy away from the typical brown-orange-yellow Autumn decor? What are your alternatives?

Much love,
Katelyn

Tuesday, November 9, 2010

Post Halloween Sale!

The only good thing about Halloween being over? Getting Halloween decorations (and costumes) half off!!

I may or may not have gotten a little over-zealous with the on-sale impulse buys but hey, girl's gotta stock up for next year.


My favorite purchase were this little lantern/luminaries from Target. I've been eyeballing them all month and they happened to have 1 of each design left! Score! So I had to get them of course.


Am I the only 13-yr-old boy who can't help but this of something dirty about this pic?

I also picked up these cute sparkly pumpkins. I envision gaining a collection of white painted pumpkins and black sparkly pumpkins, all in different sizes, to place around my fireplace next year.


I got this little wreath too. I think it's Halloween-neutral enough that I could almost use it all year round (since I have so many black accents in my apartment anyway)

Now that I've gotten my fill of Halloween decorations... time to see how I can spend less on Thanksgiving/fall decor. I'm gonna use what I have and hopefully only buy a few touches. I tried to use Halloween decorations that could be translated to Thanksgiving/fall too, like white pumpkins and orange placemat thingies and candles.

Keeping that in mind, my spending goal for Thanksgiving/fall stuff is $10. Yep. Lets see if it's possible, considering I spent about 5x my spending goal for Halloween :P

Anyone else get any fun post-Halloween decor deals? Also, how do you smartly translate your Halloween decor into Thanksgiving/fall decor? Share the tips and tricks plz! :)

Much love,
Katelyn

Tuesday, November 2, 2010

"What's wrong? I thought you LIKED frog's breath"

If you know who says that I automatically like you. And if you don't know... I will sneak into your house and leave a copy of Nightmare Before Christmas under your pillow.

Anyways, my pumpkin this year is Sally from Nightmare Before Christmas! Take a look:


This was a tricky design to carve but it's pretty close to the original I'd say!


I just love Sally and this movie *squee!* I carved this with all my fwends at a little pumpkin carving get-together the weekend before Halloween. Check out everyone's awesome pumpkins!


We have (from left to right):

  1. A creepy owl
  2. My Sally
  3. Pig from Angry Birds
  4. Totoro!
  5. Hami's 3-eyed monster eating a person
  6. A traditional jack-o-lantern
  7. Mean/yelling/throwing up pumpkin
  8. Bobby Hill

Pumpkin carving is so much fun!!! But as much as I love digging goopy pumpkin guts out of the real ones, I may switch to fakies for a while. It's just too sad when real ones die after a few days. On that note, do any of the tricks to keep carved pumpkins alive longer actually work??

Much love,
Katelyn

Double the Pumpkins, Double the Fun!

In the last post you may have noticed my oh-so-classy black nails spattered with chipped white paint. Lets see if you can guess why that was...

a) Katelyn has no sense of personal style
b) That's not paint, it's dried milk- I punched a cow in the udder. Yep, right in the udder
c) I was picking my nose and my boogers are white
d) None of the above

And the answer is... D! Actually, I was working on my latest Halloween decor DIY! (Although I won't deny that answers A-C are entirely possible)

My DIY project was whitewashing some false gourds! And I still had the time to carve a pumpkin too, so I go the best of both worlds! (More on that next post...)


Anyways, here's how it all went down:

Apparently orange is the most popular pumpkin color. Bah. I've been scanning the stores for white pumpkins and they are SCARCE. Those that I have found are on the pricey side (like $9-$19 for a medium sized one). The only cheap ones I found were at World Market, but they only had one size and girl's gotta have a little variety.

So I thought about nabbing some cheap-o orangies and painting them white to stick it to the man(ufacturer), but I didn't know if I'd have time. Then our group of friends decided we were having TWO pumpkin carving get togethers (because we are awesome)! So I was able to devote one of those evenings to carving and the other to painting. Whoopwhoop!

Oh yeah, and I chose fakies to paint because unfortunately real pumpkins don't last forever :( Which I was reminded of all too well with my carved pumpkin, which was already kaput after just a few days. Anyways, here are my fakies pre-white paint:


Not bad if you're going for that brown-orange-green-yellow look, but not for me. After a few coats of 99¢ paint they were done! Here's the breakdown:

  •  3 fake gourdies- $3.25 in total (they were half off!)
  • white craft paint- 99¢
  • black craft paint- 99¢
  • foam brushes- on hand (but you can get a big pack for a buck or two)

    Total: $5.25

Woot! And I still have extra paint for future projects! (On a side note, I considered getting spray paint instead of cheap craft paint but I didn't wanna have to go outside and be anti-social during pumpkin time with the friends!)

How are pumpkins going for everyone else? Where do you stand on the real vs fake, carved vs painted debate?

Much love,
Katelyn

Tuesday, October 26, 2010

How To Easily Install a Hanging Light, Renter Style

So I've got my new light up! I ended up deciding on just one from World Market. Partially because three cost a lot more, and partially because one of those three was the wrong shape (different than what the label showed, how fwustwating).

This little project was so easy it doesn't really need a "How-To," but I wanted to put it out there for anyone else living in an apartment who might be a little intimidated by light installation. It required no permanent installation at all so it's perfect for renters!

Here it is!

Mochi's got her lasers on

What You Need:
  • Hanging paper lantern
  • Light cord (some lanterns come with it, but if they don't you need to buy it separately. It's got a normal 2-prong plug on one end and a lightbulb socket on the other)
  • Two 3M hooks


What You Do:
  • Plug one end of your wiring into the wall (this is just to make sure you have enough slack to reach the place you want your light hanging from)
  • I ran my cord to the corner of the room, up the corner (sort of hidden by my curtains)


  • Place a 3M hook on the ceiling right at the corner and loop your cord through it


  • Run cord along ceiling to desired spot (wherever you want it to hang down from)
  • Place your other 3M on the ceiling in that spot and loop your cord through it, letting the extra length hang down vertically

  • Adjust the slack of the cord until you get it hanging down the desired length (this depends on how low/high you want your lamp)
  • Now that you've got it the perfect length, unplug it!
  • Screw in your lightbulb
  • Attach the lamp (it'll come with instructions, takes about 2 seconds)
  • Plug back in and ta-da! Lamp-tastic!

So to refresh your memory, here is the transformation:


See, that wasn't hard at all! And since we used 3M hooks, there's no permanent damage like holes in the ceiling. Super simple. And it cost a total $17 ($10 for the light cord, $7 for the lantern. I already owned the 3M hooks).

Now comes the following question: do I leave this as is or add more hanging lights? I'm still considering getting two more different sized, slightly smaller ones and having a little light threesome in my corner (hehe) or maybe replacing this one with a slightly bigger one? What say you?

Much love,
Katelyn

DeLIGHTful or The LIGHT fail?

Eh eh? Pretty clever play on words right?

*silence*

Well fine then.

*gets hit with a rock*

You're just supposed to throw tomatoes people!! Bahh


Anyways, my Target hanging paper lantern idea was a mess of fail. They are technically outdoor lights, meaning when I got home and opened the box I saw this:


Eeek! Green wire! Green wire that is NOT gonna look good hanging from my white ceiling!!!!

I had no choice but to reevaluate my options. (hehe, REEEEEV-aluate)

Option 1: return the target batch and opt for the World Market ones I mentioned in the last post. Maybe do 1-3 big hanging lanterns instead of 10 little ones. Could be cool, but might be pricier.

Option 2: get some white spray paint and make those ugly green cords white! Huzzah!

I'm just thinking out loud here, but I'm pretty sure I'm gonna go with Option 1. Why? Because I can hook everything up and see how I like it, and if I don't like it I can return them and then go with Option 2. If I go with 2, there's no returning that puppy after I've spray painted the crap out of its cords.

Anyone have any other options I should consider? Or places that I can get hanging paper lanterns cheaper than World Market?

Much love,
Katelyn

Friday, October 22, 2010

Let a Little Light In!

Although my checklist of apartment requirements was miles long (I was told by several apartment management people that they felt like they had taken an exam by the time I was through with them), there was one thing I didn't ask about that I should have: lighting.

At the time, I was so caught up in safety and price and how much a pet deposit was that I didn't focus on things like lighting (or ugly brown carpet, oy). Therefore, certain corners of my apartment sometimes looks like this:

Dark shadows live in this corner! :P

I'm on the top floor of my apartment building, meaning my living room has less lighting than the other floors do. Why, you ask? Because instead of having a wall-sized sliding door like the lower floors, I have a fireplace. Which I'm sure I'll love when it gets chilly if I can get over the fear of burning the place down. But sometimes I wish I had more light instead.

Also, I guess it doesn't help that I keep my blinds and curtains closed as much as possible because I like living in a cave to keep the apartment cool (gotta reduce those electric bills!) And that's not gonna change til Texas actually cools off in December or so *shakes fist, cursing Texas heat*

So I have to find a way to bring in some more light into the apartment.

I've already added three table lamps to my bedroom, a floor lamp in my living room, and another floor lamp in my dining room- but it's not enough! Particularly in the living room. Yeah, in that corner where all the shadows are growing. But I don't have much floor space so I didn't want to add the necessary table for a table lamp, and I wasn't sure I wanted a third standing lamp. So my idea? Hanging paper globe lanterns!

I've had my eye out for them for quite a while now. I found some at World Market that were $6-$10 depending on the size, which wasn't too bad, but I'd also have to spend $10 on a cord/light socket for each of them. But then I found a set of ten at Target for $20! That's $2 each! AND they included the needed cords and stuff! I was sold. Granted, they're small but maybe I'll like the look of several small hanging lanterns better than a couple big ones. And if I don't, I can always return them :P

Anyone else have one of those dark corners/rooms? How did you bring in light (especially if you don't have much room to work with)?

Next post will hopefully include a picture of this same corner but with a whole new glow! Wish me luck on my first (semi) light installment.

Much love,
Katelyn

Thursday, October 21, 2010

HALLLLOOOOWWEEEEEEEEEEEN!!! pt 5: Frightning Fireplace (and Creepy Coffee Table)

This is the last of the major Halloween decor posts (unless I update the looks at all between not and October 31st, which could definitely happen). Here is how I decked out my living room!


First off we've got the coffee table! I used a sheer white scarf I already owned, layered the other orange thingy on top of it, used the candle holder that was already there, and added the black roses. I topped things off with the little raven to make it not so symmetrical.


This one was difficult because the coffee table is one of Mochi's favorite spots. And that little girl will nom on EVERYTHING. Seriously, she's like a hamster. So this spot either had to be Mochi-proof or had to be easily converted into something Mochi-proof whenever I left the house. The roses were uber cheap and tougher than they look so I wasn't too worried about them, but Mr. Raven is more delicate and expensive! So whenever I leave, he gets to hang out on his perch above the TV far out of reach.


Next up is the mantel! This was a lot easier because it was out of Mochi-reach. I left my usual picture and vases on either side, but I added my black sparkly rose garland which filled the space perfectly! I love the little vines that crawl out from the roses. I then added a little painted wood cat statue that my mom got me years ago. The yellow moon reflects the yellow in the framed picture above.


Lastly, I topped things off with the rest of the bat cut-outs I had made. I also think it's kinda cool that the vase I had on the right is already a little creepy- good thing I tend to like creepy-glam-modern accessories!


And now... Lights off!!


Creepy!!

Anyways, that's the last of the Halloween decoration posts (unless of course I add to them or switch things up, which is a definite possibility).

So how is Halloween decorating going for everyone else? I am dying to see pictures of other people's Halloween displays! Plus feedback is always nice :) I know I have a long way to go before I've got Martha-Stewart worthy displays, but I'm trying! :P

Much disturbingly creepy love,
Katelyn

Wednesday, October 20, 2010

HALLLLOOOOWWEEEEEEEEEEEN!!! pt 4: Skull-tastic Centerpiece

Yay for corny names like "Skull-tastic Centerpiece!"


Candy corn + glittery skulls + silver tray = creepy fun glam!

(And you can't argue with math.)


My thing about centerpieces is that if I want them to be usable, they can't be so tall that I can't see the person on the other side. So this long, shallow silver tray was perfect! Plus it was on clearance at Target for a mere $3 so I had to snag it up.

I originally had it filled with tea lights and had no intention of putting the skulls in it. In fact, my plan was to put the skulls horizontally in a vase I already had, one on top of the other. But they were a smidge too wide to fit! And I loved the creepy little dudes so much that I couldn't NOT use them. So I ditched the tea lights, filled the tray with extra candy corn that wouldn't fit in the bowl, and topped it with my skulls. Perfect fit!

It's simple, small (good for Mr. Tiny Table) and not too high so it doesn't block anyone sitting across from me. Great success!

Hope you guys like it. And does anyone else have the same issue with tall centerpieces? Yes they're gorgeous but how do they not get annoying?? Let me know your short centerpiece ideas and solutions.

Much spooky spooky love,
Katelyn

Tuesday, October 19, 2010

HALLLLOOOOWWEEEEEEEEEEEN!!! pt 3: Evil Entry Way

My entry way table was definitely the main focus of my decorations. Really, the only reason other parts of the apartment got anything is because I bought way more than could comfortably squeeze on my little table! Anyway, here it is!

Oooooooo aaaaaa creepy! :D

This was actually my 4th whack at this table. Here are a couple of the reject attempts that I bothered to take a picture of...


 They just felt so crowded! I realized my problem was the orange thingy. it wasn't quite long enough, so it restricted the space I could use on my already tiny table. So I ditched that puppy and pulled out a scarf I had to use as a runner instead! Perfecto!

Just a little ghosty close up :)

Anyways, the candy corn is in a regular-ol' cereal bowl, and the pumpkin is in a margarita glass. I raided my kitchen! The bats are simple construction paper using a cardboard stencil I free-handed, and the "BOO" is made of the leftover paper. This was a very easy-to-put-together display once I decided on my black , white, and gray theme (just a hint of orange with the candy corn and pumpkin frame)

Now for the fun part... time to turn off the lights!


Yay!!! I love it!!! Even though it might be a slight fire hazard! (No worries kids, I don't keep them lit that often)

What do you guys think? More to come on other parts of the apartment!

Much Halloweeny love,
Katelyn

HAAAALLLLLLOOOOOOWWWEEEEEEEEEEEEEN!!!!!! pt 2

Before I started Halloween shopping, I decided my best bet was to set a goal for myself not to spend more than $15-$20 on decorations, tops. This isn't all my stuff but it's at least a small portion of the chaos.

See, Mochi IS part of my decorations!
Anyways, lets see how I did...
  • 3 glittered skulls- $1.50 each
  • Ghost candle holder- $2
  • Candy corn- $2 
  • Pair of orange over-sized place mats/cloth napkins- $2.50
  • Long silver tray- $3 on clearance
  • 6 black roses- $1 each

    Ok, good so far....
  • Wooden/paper raven- $10 (I know, splurge- But he is adorable!)
  • Black candelabra- $10 (on clearance at Hobby Lobby!)
  • 4 big black pillar candle stands- $8 all together (also on clearance at the Hobbs!)
  • 2 little glass pillar candle stands- $1 each
  • White ceramic pumpkin- $4
  • Buttload of candles- about $30 (PS- buttload = 28, 20 of which came in a value-pack)
  • Black rose garland- $10 (my mantel needed something too!)

    Notice that I must somehow justify everything that put me over the $15-20...
Total- $94


So I failed. Epically. But I'm good at justifying failure because I told myself that the candles, candle stands, and candelabra can be used all year round! And technically the little pumpkin and orange place mats can at least be used til Thanksgiving...
 
Mochi refused to let me steel her orange thing away

Anyways, the moral of the story is that Halloween is amazing and I'm lucky I didn't break the bank even worse on decorations! Stay tuned for pics of the delightful decor displays!

How did you guys do this year? Please share your Halloween decorating successes or epic failures! Also, any tips on how to save more even when you don't have much to begin with?

Much love,
Katelyn

HAAAALLLLLLOOOOOOWWWEEEEEEEEEEEEEN!!!!!!

I'm a little excited that Halloween's gonna be here soon. Ok I'm REALLY excited!! I've been excited since August!!!! Woohoo!!!!!!

Since I've had Halloween on the brain for months, I had plenty of time to develop a decorating game plan. Even though my heart was screaming "spiderweb and skeletons and cauldrons and witches and fog machine and fake blood and coffin and strobe light!" my brain was screaming "get ahold of yourself! You know you can't spend hundreds of dollars on decorations that you'll only pull out once a year!" All the while I cursed Martha Stewart and her skills/money out of pure, green jealousy.

Oh Martha, how I envy your skills and money
Since Martha-price range of decor isn't an option, I'll just use what I have and make a few cheap purchases to spruce it up! All the cool decorating bloggers (like Sherry from Young House Love and Katie from Bower Power and Sarah from Thrifty Decor Chick) are doing it! So I can do it too!

Right?

...Ok, it may not be quite that easy. See, I moved in with pretty much nothing binders full of old exams and a bunch of Warhol posters, so I don't yet have an army of votives and cake stands and vase fillers and table runners at my command *sniffle* (My goal is to one day I can have my own in-house decor store, but until then I just have to build up my repertoire!)

Don't get me wrong though, I have made a FEW purchases since moving in so I'm not working with absolutely nothing- plus, I welcome a challenge! So lets take a look at what I DO have that could maybe be used for something cool and Halloweeny:

  • Black wooden votive holder I snagged from home (thanks mom!)
  • A couple cheap glass vases
  • Plain white cereal bowls (could be used for candy!)
  • Dead Dried flowers
  • Small painted black cat statue (thanks again mom!) 
  • Black cat "Moon Kitty" print that was already in one of my frames
  • My "kinda-creepy-if-you-think-about-it" ornate frame that already has a construction paper pumpkin in it
  • More construction paper
  • Black fabric leftover from the squares
  • A few black and white scarves (aka possible runners?)
  • Suuuuuuperrrr crrreeeepy black cat! Yes I'm including Mochi in my Halloween decor :P

Alrighty! Not a horribly scary start!

I'll let you know what I come up with in the next post. In the meantime, I'm off to Target and Hobbs to the Lobbs to find some cheap Halloween decor :)

Much love,
Katelyn

Grouped Frames: Cheaper Than You Might Think

l knew my entry way was in dire need of something that said "come on in, this apartment is warm and inviting, please have some candy, yep, we have candy! but not in the creepy kind of way! Not like we're enticing young children into a boiling pot of water or anything!"

So in order to communicate this (because saying that verbally tends to make people uncomfortable) I opted to do a framed art grouping and get a little "catch all" console table instead.


The best part? It was SUPER cheap!

I payed $5-$10 for each frame (and the 2 black chandelier tiles) thanks to a half-off frame sale at good ol' Hobby Lobby, and the art was my own so it was free! Even the 2 framed canvas prints from Target were only $16 a pop if I remember correctly. And the table, which was $99 from target, was a present so that deserves a little happy dance! *does happy dance*

I think this put me a total of about $70 out of pocket. (I'd have an exact number for you, but at the time I didn't know I was going to start a blog so I didn't keep track exactly- sorry!)


My favorite right now is the ornate frame because it's framed fabric that I can pin different things onto! So since it's October, I made a little jack-o-lantern out of construction paper and sharpies. Took about 5 minutes. Woohoo for fast and cheap decorations!

Ps- I also sincerely apologize with all my heart about the photo quality. These were all taken with the ol' iPhone.

Have you guys had success with grouped photos? How did you make it something affordable?

Much love,
Katelyn

Living Room Projects: The Good, The Bad, and The Ugly


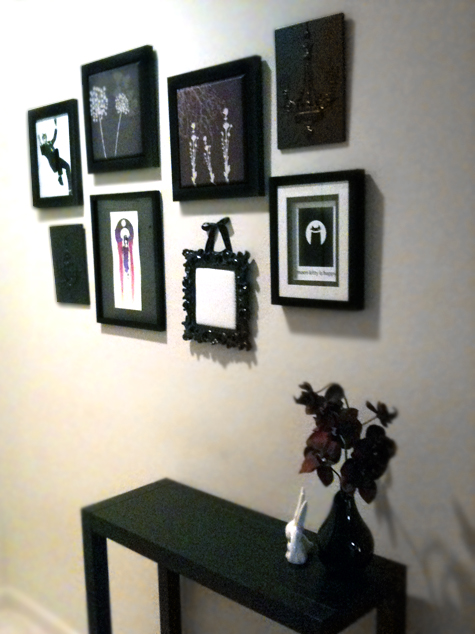
You guys got a quick and dirty overview of my living room in the last post, but I wanted to get into the details of some of the little decorating projects I've done here. They're all things that cost me very little money (of course) and were pretty easy to do (also of course).
The thing is, I'm not a power mom with the ability to do a bathroom renovation in a weekend and I don't have a whole craft room full of supplies, so when it comes to projects, if I can do it- YOU can do it. Yay I'm so motivational! :)

So, here are my projects:


The Good: Custom Coasters


This was the easiest little DIY and I get compliments on these all the time! I love my black $40 IKEA coffee table and wanted to protect it, but all the cute coasters I spotted at places like Anthropologie were at least $5 a pop and I was NOT about to spend $20+ on a few measly coasters. So if I couldn't find a set I liked, I'd find a cheap set and make them into what I like!

I found this batch on clearance at Pier 1 for about $8, and they are meant for sliding photos into (of your kids, pets, trophy husband, latest victim.. etc). But being an artsy fartsy, I cut up an old screenprint painting I'd made a few years ago and used pieces of that instead! The hint of yellow goes perfectly with my rug, art above the mantle, Target pillow, and oddball yellow square on the wall. Speaking of the squares...


The Bad: Square Frame Flop


There they are above the couch *points with a stick*

This was actually the first project I attempted: squares. Wooden, frame squares that I could stretch fabric over. I got the idea from the wonderful IKEA catalogue and DIY projects like this. But I wanted my fabric-y frames to have a little more lift away from the walls so I decided the best way was to actually build wooden frames! With a few cheap boards, Hami's dad's table saw, and handful of nails we whipped up 6 of these babies in an afternoon.

Mochi wanted them for her fort
So far so good! But then came the time to cut fabric and staple on the fabric. Here was my thought process (travelers beware, you're about to step into the indecisive mind of Katelyn!):

"I wanna add color to the room so I'll pick fabrics with color! Lots and lots of color! Ok maybe having yellow and blue and pink and red and purple all with busy patterns looks like Rainbow Bright threw up on my wall... You know what, scratch the color! I want black! Classy black! *changes all but 1 frames to black* Well crap, all black is boring and shows all the inconsistencies and wrinkles I couldn't stretch out. This sucks... I'm gonna watch some South Park online. *opens laptop and never returns to fix the "square problem*"

That's pretty much how it went. I haven't touched them since. Fear not though! They won't be like that forever! Just until I decide what I want to do with them... Now, onto the last project:


The Ugly: (but functional) Curtain Holdback Helpers


I'm not sure if the picture above shows it, but my windows are so close to the corners of the room that there was no space on the sides of them to put holdbacks! But where's the fun in window treatments if you can never open them up? I had to find a cheap and effective solution.

My first though was using tassels. But those little guys are $7-$15 a pop on the cheap side and I needed 4 of them! That means $28-$60! No way Jose.

My next thought was ribbon, but wanting my little bows to always look perfect meant I actually had to spend valuable time whenever I wanted to let a little light in. No deal Shaquille.

I started thinking to myself that something incorporating a little hook or loop would be a lot easier than tying a bow. That's when the idea was born. I had these tiny hooks laying around with a clip on end. I bought a $2 pack of black simple headbands, clipped my hooks onto them, wrapped them around my curtains, and used the hooks to secure them. Voilà!


Well there you have it! The good, the bad, and the ugly of my little living room DIYs thus far.

Which projects have been your "good, bad, and ugly"? Please link to them, I'd love to see!

Much love,
Katelyn